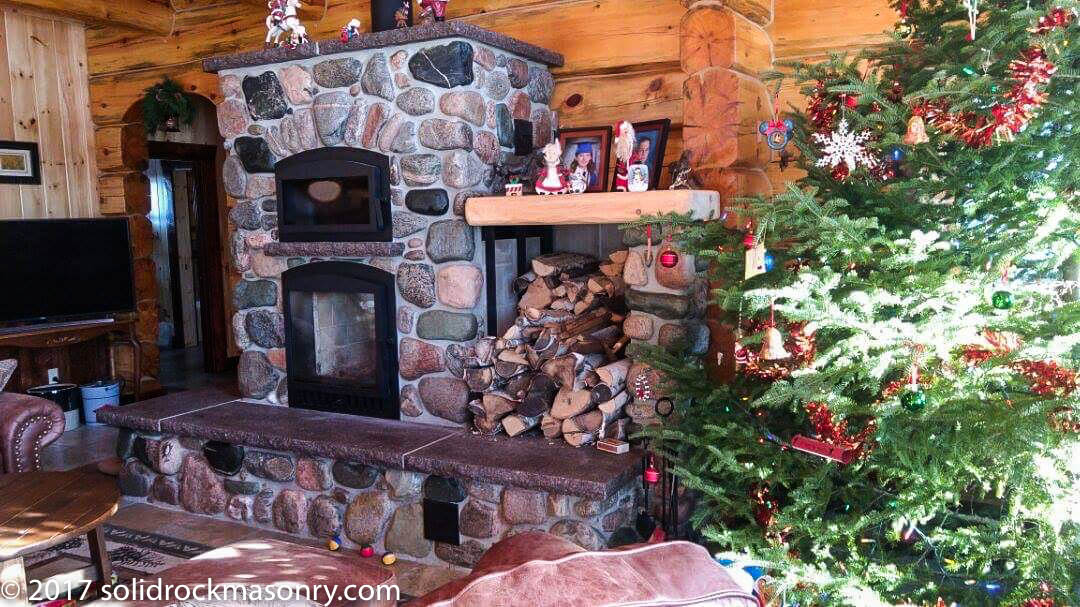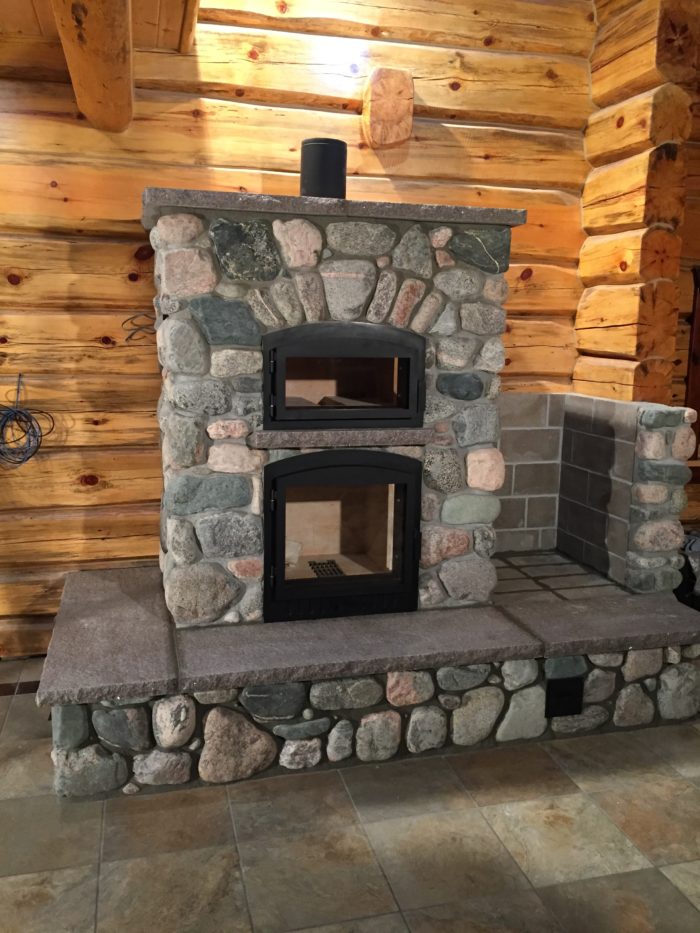
Here is an updated photo of the Nielsen SR-22 Stone Masonry Heater. I built in 2017 with fellow heater builder Derek Kowalchuck of Fiddle Rock Masonry. This stone masonry heater is a J-loop style designed heater with a black, directly fired bake oven and a 3 sided heated bench. We finished this stone masonry heater with local granite fieldstone. Along with a granite hearth, capping slabs and a wood box on the side. We consider this a Hybrid Core System due to the use of building primarily with firebrick, a few cast refractory pieces and large clay tile liners. Here is a link to the build a just like this one https://solidrockmasonry.com/2019/01/scantlin-sr-22-with-white-oven-3-sided-heated-bench-rear-wood-loading-door-and-side-chimney-finished-with-local-granite-fieldstone/

SR-22BO Core Build
First course of the heater construction. 4″ solid CMU block and firebrick base.

Firebrick base course

Bottom channels of the heater with an extra 2.5″ course of firebrick height for the heated bench channels. Box in center is for the ash drop.

We set the firebox floor castings in place and then the outer firebox walls were built with an inner replaceable firebox liner. Because if you ever need to replace the firebox the inside liner is replaceable due to the weight of the core being on the outer firebrick. The hole in the center is used for an ash drop.

We spanned the firebox opening with our stainless steel and mild steel angle iron system. At this point the firebox is transitioning into the throat of the heater. This creates a venturi effect of speeding up the gases and further mixing the gases. We laid the bricks from the firebox in a cantilevered fashion for a few courses towards the center of the heater. Therefore forming the floor of the bake oven.

Here we have built the black oven and upper chambers with the caps in place. We use 1/2″ ceramic wool for gaskets to separate the main core from the draft channels.
Masonry Heater Transitions

Derek is washing the brick in the upper channels above the bake oven cap. This is the where the heated gases are transitioning and turning into the draft channels. We have the front channel by Dereks elbow coming up from the oven. This then directs the gases to go down a channel down the left and front right side of the heater.

Here is an example of using large clay tiles liners as part of this J-loop bell heater. Another alternative material that you could use for the bell channel would be firebrick or cast refractory. We are using them here for the left bell with a 6×9″ hole cut into it for the transition into the heated bench.

We are using 8×12″ clay liners here for the 2 draft channels on the right side of the heater. The channel on the left is the down drafting channel/bell coming from the top of the heater. Once the gases from the left channel reach the bottom they transition into the right channel/bell. At this point the gases are directed up and into the top chamber and exit into the chimney. We cut a hole on the bottom of the right channel for the heated bench connection.

Left side of finished core with heated bench connection

Right side of finished core with heated bench connection
Stone Masonry Heater Finishing

The Nielsen family owns a farm so they hand picked all of the granite fieldstone that we used for finish their heater with. Once the core was completed Derek and I wrapped the core with fiberglass mat.Thereby separating the core from the outside facing material. Creating our expansion joint around the heater. Similarly you could use cardboard for this expansion material. Otherwise, if you didn’t have this separation between the firebrick and stone you would end up with expansion cracks all over your heater. We set the granite for this stone masonry heater with Type N mortar.

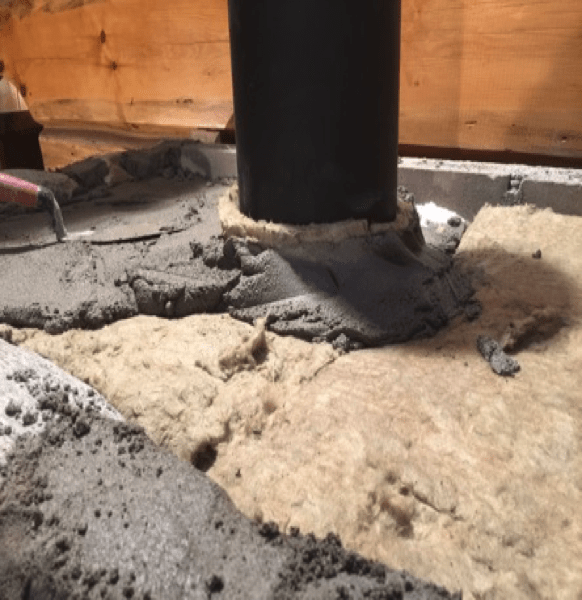
Stone is finished to about 5″ above the top of the finished core. After the stone is to the top we installed the chimney connection piece. We then installed 3.5″ of mineral wool insulation on top of cap and then 2″ of mortar to seal the cap.


Voila! Here is the finished stone on the heater with the first chimney connection. The Nielsens finished the woodbox off with some sawn timbers and also connected the remainder of the chimney pipe.

